How to do a basic facial at home.
●🌸● ●🌹● ●🌸● ●🌹● ●🌸● ●🌹● ●🌸●
Hello Beauties !
How are you ? Hope you all are doing well ! And for those who are feeling a little bit low these days - Remember one thing that everything will be OK & fine. Here are some positive vibes, I am sending you. As Zoe Kravitz have said -
In Beauty care , facial comes top in the list. Professional facials are fantastic, alluring, exquisite & resplendent.
But, they can also be expensive. Sometimes, you pay good amount and still feel they are not satisfactory. Also, it takes a lot of time to go out for facial and spend few hours there. It is sometimes hard to take time due to busy schedules of hectic life. Here is the solution. Why pay so much for facial when you do it yourself at home? It not only saves your money but it is super easy too. This basic five step facial can be done once a week and works on all skin types including oily, dry and combination skin. Isn't it convenient and really a good news.
Get ready for a home facial by collecting your favorite products. You can also use natural things available at your home and even make many skincare products/items easily at your home. These DIY are also better option for harsh chemical based products as they are natural. It saves your money too. So, why to wait more ? Let's get started...

Before starting your home facial treatment, it is important to take some time to relax while you treat yourself to a spa night. It will give you more desirable results. Later you will enjoy the look and feel so fresh with glowing skin. It will give you a rejuvenated feel.

Here are the basic steps of facial :


Hello Beauties !
How are you ? Hope you all are doing well ! And for those who are feeling a little bit low these days - Remember one thing that everything will be OK & fine. Here are some positive vibes, I am sending you. As Zoe Kravitz have said -
Beauty is when you can appreciate yourself. When you love yourself, that's when you're most beautiful.
In Beauty care , facial comes top in the list. Professional facials are fantastic, alluring, exquisite & resplendent.
But, they can also be expensive. Sometimes, you pay good amount and still feel they are not satisfactory. Also, it takes a lot of time to go out for facial and spend few hours there. It is sometimes hard to take time due to busy schedules of hectic life. Here is the solution. Why pay so much for facial when you do it yourself at home? It not only saves your money but it is super easy too. This basic five step facial can be done once a week and works on all skin types including oily, dry and combination skin. Isn't it convenient and really a good news.
Get ready for a home facial by collecting your favorite products. You can also use natural things available at your home and even make many skincare products/items easily at your home. These DIY are also better option for harsh chemical based products as they are natural. It saves your money too. So, why to wait more ? Let's get started...

Before starting your home facial treatment, it is important to take some time to relax while you treat yourself to a spa night. It will give you more desirable results. Later you will enjoy the look and feel so fresh with glowing skin. It will give you a rejuvenated feel.

Here are the basic steps of facial :
●🌸● ●🌹●BASIC STEPS OF FACIAL ●🌹● ●🌸●
STEPS 1 : CLEANSE
The first step in any facial is to cleanse your skin with a cleanser formulates for your skin type. You can find out a good cleanser suitable for skin in department store cleansers, a basic drugstore cleanser or brands available in market. You have to find out that it should be perfect for your skin and should work well. Try to go for non-alcohol based cleansers as alcohol based cleanser can make your skin dry in long run on further use. You can save money here and can spend it on other important products like moisturizers.


Cleansing not only removes dirt and dust from your face and neck skin but it also removes dead skin and other waste particles accumulated to your skin.
First of all, remove all the makeup if you're wearing. Don't forget to remove eye makeup with a makeup remover.
To cleanse your skin, rinse your face & neck first with lukewarm water. Never use hot water here. It can burn your skin and it can also take out natural oils from your skin leaving it dry. Apply the cleanser on your forehead, cheeks, chin, on whole face and on neck in dots. Now, massage the product into your face and neck I'm circular motions in upward direction for at least one minute. Make sure to get around your nose and the chin.
After you are done with it, rinse your face & neck with normal eater or use a warm washcloth to gently wipe the face.
For eye make up removal, you can go for Neutrogena Oil-Free Eye Makeup Remover from drugstore or Clinique Take The Day Off from the department store.


STEPS 2 : EXFOLIATE
There are several ways to exfoliate your skin. You can go for scrubs available in the market or at drugstore etc. Many people prefer Clarisonic Mia, though it's not necessary. Instead, you can try this simple three-step method with your favorite store-bought or homemade scrub. You can make your own facial scrub at home. Please visit this blog for homemade facial scrubs.
To exfoliate your skin, apply a gentle exfoliating facial scrub in a circular motion on your face. Using your fingers, concentrate on the areas around your nose and forehead. If you have a combination skin, pay more attention on the areas that appear to be greasy.

After this, rinse your face with normal water or use a soft washcloth soaked in warm water to wipe out residual product and to rinse your face. The washcloth itself act as a natural exfoliant. You can also try Bamboo Baby Washcloths.
Now, it's time for next step !
STEPS 3 : STEAM
After exfoliation , steam is the next step to be done. It is an important part of facial. To steam your face, you can fill your sink or in a bowl with water. Now, dip a washcloth in it and press it to your face, repeating two or three times.
You can also take it further if you want and boil water in a teapot. Add soothing herbs into it. This can enhance the experience and you can get even more rejuvenated feeling.
STEPS 4 : MASK
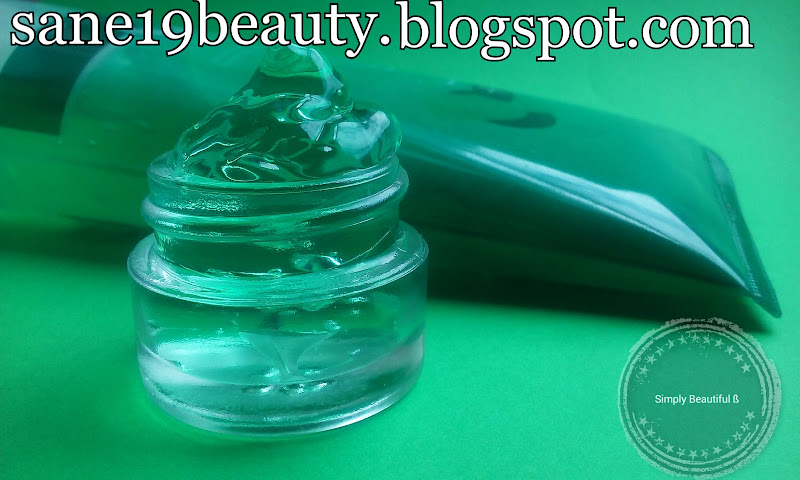
You can choose face masks according to your skin. There are many options available in the market. For oily skin, use a clay-based face mask. If you have dry skin, go for a hydrating gel or cream mask. You can make face masks and packs at your home too with natural ingredients. This will not only save your money but will give you natural products that are chemical free and they are easy to make at your home. You can go for homemade DIY face masks made up of oatmeal , sugar or coffee. They are suitable for any skin type. For homemade natural face masks and packs, visit this blog.


Apply the face mask avoiding the areas around eyes or eye contour area. Keep it on for 10 to 20 minutes or according to the directions on the product. You can use cucumbers on your eyes. They are not necessary but they can do wonders for relieving tired eyes. Cucumber slice makes your eyes feel relaxed and they can also help in treatment of dark circles. Just sit back and relax now. You can have some soothing music on and a few candles that can really add to the spa experience. When time is up, be sure to remove pack completely by using washcloth or by rinsing the mask off completely with normal water.

STEPS 5 : MOISTURIZER
Moisturizing your skin is very important after applying face mask and rinsing it off. Many home facial recommendations suggest using a toner in between the mask and moisturizer. However, it is not necessary. If you have an oily skin, applying toner is a good idea. For other skin types, the other products will leave your face clean and give you a healthy glow.


Whether you use a toner or not, moisturizing is an important and last step of your facial. Apply and smooth on a soothing, basic moisturizer over your face and neck. If you want something that's both organic and cheap, you can try extra virgin coconut oil.
TA...DA your basic home facial is done. Enjoy rejuvenated skin and feeling. You are ready to rock on and for a great week ahead ! 😊
A Post By Admin.
Author - Swatti Sharrma ß
●🌸● ●🌹● ●🌸● ●🌹● ●🌸● ●🌹● ●🌸●
Disclaimer - This blog is not intended to any prescription or expert advice. Always consult your doctor before consuming or applying anything. Always check for your allergies. Always do patch test or allergy test before using any product or any ingredient. Results may vary person to person. It depends on your skin type and health conditions too. Use info. on your own wisdom.
© Simply Beautiful ß
Swatti Sharrma ß


Comments
Post a Comment